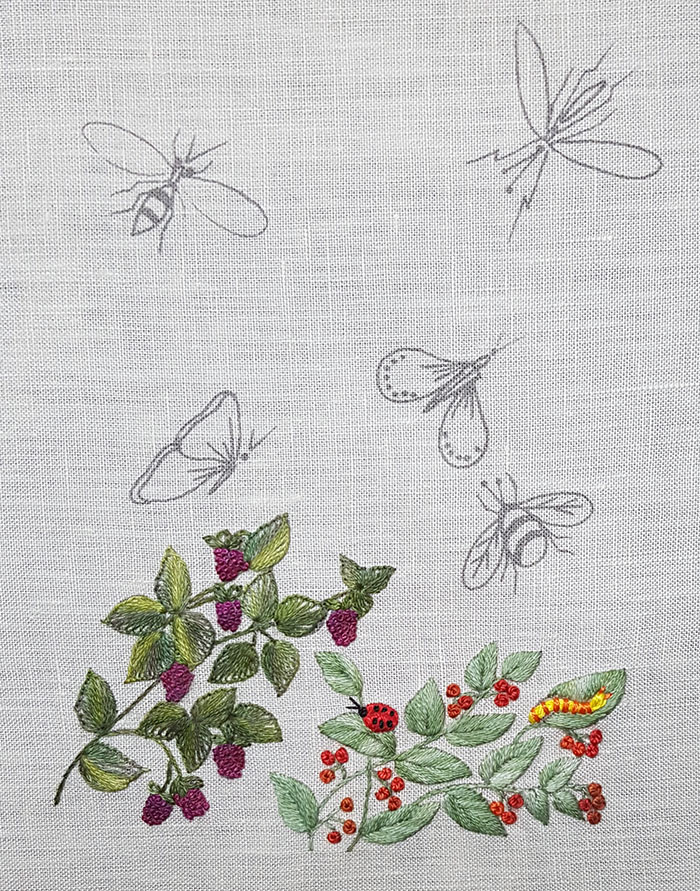
Taking flight
This project contains stumpwork
It is in fact an embroidery that we had made several years ago but which needs a good rejuvenation. I propose you accompany me in this process.
The purpose of this work is to embroider butterflies and insects using different techniques including stumpwork.

The plants
The pattern of this project can be downloaded HERE
Raspberries
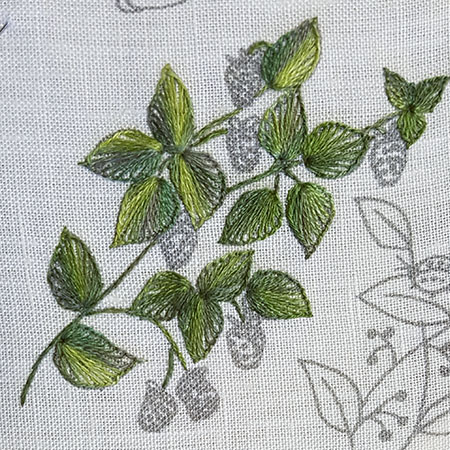
The stems are embroidered in stem stitch with 1 thread.
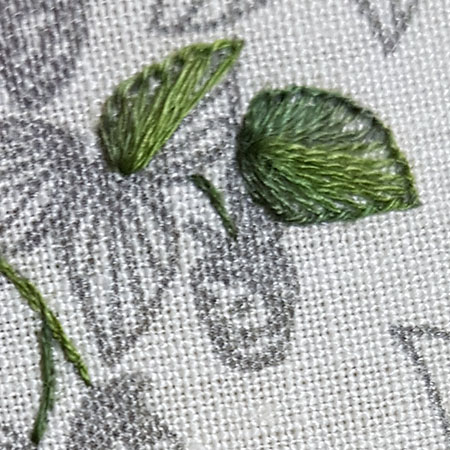
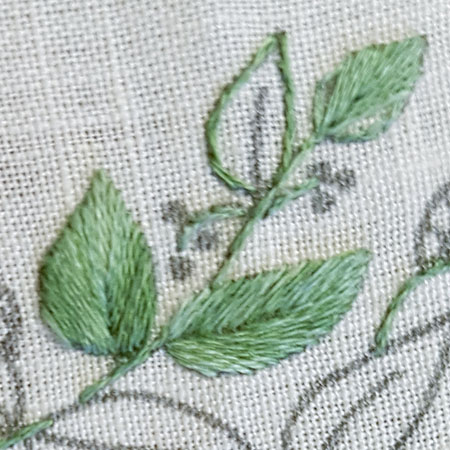
The leaves are embroidered in blanket stitch with 2 threads. All the stitches start from the base of the leaf and are embroidered fan-shaped. To obtain pretty sharp leaves, I fix the stitch to the top and I continue to embroider on the other side of the leaf.
Here is the picture of the completed leaves.
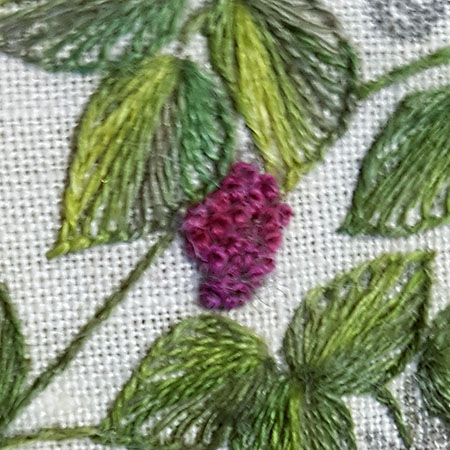
The raspberries are embroidered in French knot with 2 threads and 2 wraps.
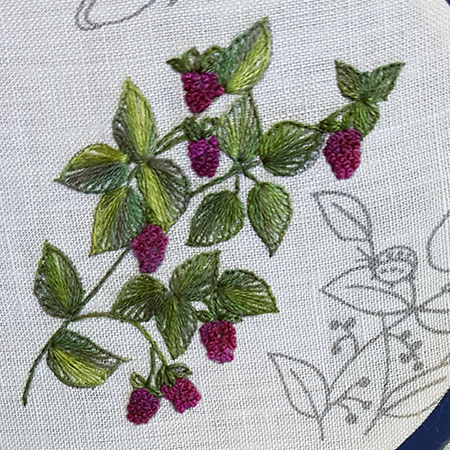
All the embroidered raspberries are complete.
Red currants
The stems are embroidered in stem stitch with 1 thread.
The leaves are first rimed with split back stitch 1 thread then embroidered in fishbone stitch also with 1 thread.
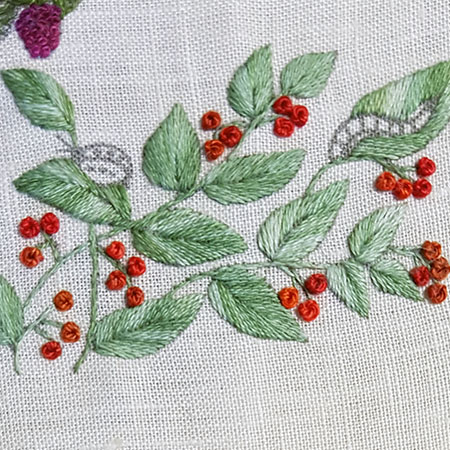
The currants are embroidered in French knot with Perle cotton n ° 8 and 2 wraps.
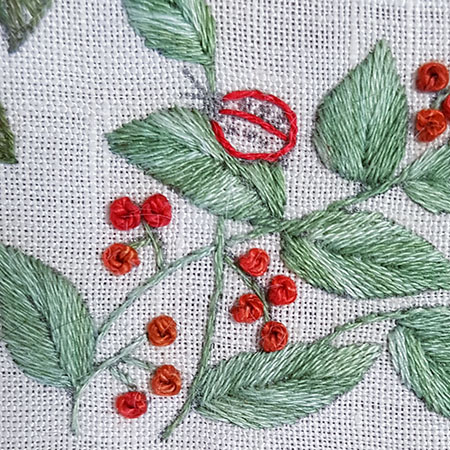
First, embroider the outline of the Ladybug with split back stitch and 1 thread.
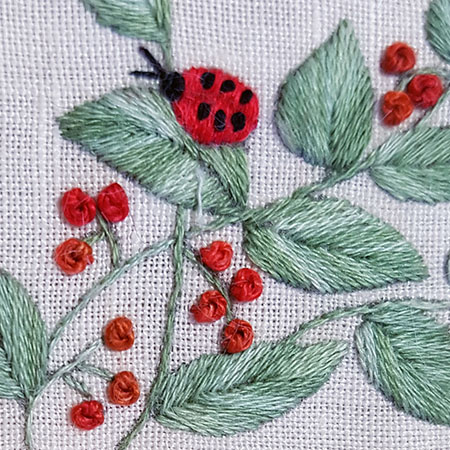
Embroider the Ladybug with satin stitch 1 thread vertically carefully separating the 2 wings.
Embroider the dots on the wings with French knots 2 threads and 1 wrap, the head with a French knot 2 threads 2 wraps and antennas with 2 small straight stitches 1 thread.
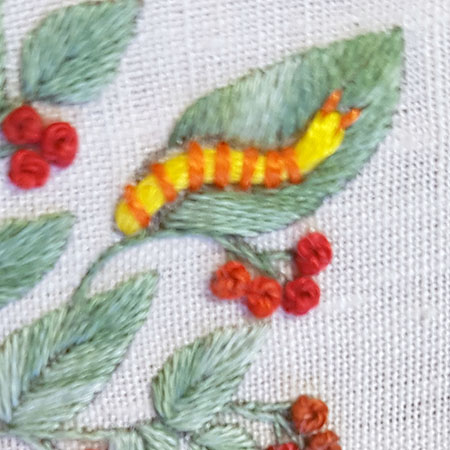
The caterpillar is embroidered in couching with 12 threads for the body and 3 threads for the rings.
The antennas are embroidered in straight stitch with 1 thread.
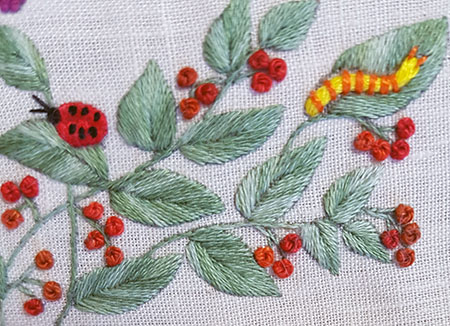
Here is the finished pattern.
Kerfeunteun stitch ( Glazig embroidery)
Kerfeunteun stitch Glazig embroidery The stitch Kerfeunteun is part of the many stitches of Glazig embroidery We owe this stitch to Karine and Yann, embroidery teachers at the school of embroidery art of Pascal Jaouen in Quimper who have brought it up to date. They...
A bird in a harlequin suit
A bird in a harlequin suit The challenge of this project is the following The transformation of this monochrome print into a beautiful flaming bird. This is an original and interesting creative process that I look forward to sharing with you. We...
Needle painted Hibiscus part 5
Needle painted Hibiscus part 5 Flower 2 Petals h, f and j Flower 2 petal h This petal is embroidered with colors #353, 760, 891, 350, 817 and 815After outlining the petal with a split backstitch, begin by embroidering the first stitches with color 353. Continue...
Nutcracker
Nutcracker a romantic Christmas NUTCRACKER is one of those magical works that everyone has heard of but few have ever had the opportunity to see on stage. One of the gems of the classical repertoire, NUTCRACKERis one of the most danced ballets in the world. A...
Needle painted Hibiscus part 4
Needle painted Hibiscus Flower 2 Petals g and i When it came time to embroider the second flower, darker than the first one, I put aside the lighter colors (DMC 819 and 818) to replace them with much stronger colors, namely DMC 760, 350, and 817. . Flower 2 petal i...
Needle painted Hibiscus part 3
Needle painted Hibiscus Flower 1 Petals c and d Flower 1 petal c This petal is embroidered with colors # 819, 818, 353, 894, 892 and 891. Prepare to work the petal by outlining it in backstitch with color 819 and 1 thread. First, place the color 819 with long...
Needle painted Hibiscus part 2
Needle painted Hibiscus Flower 1 Petals a and b Flower1 petal a This petal is embroidered with colors # 819, 818, 353, 894, 892, 891 and 816. Prepare to work the petal by outlining it in split backstitch with color 819 and 1 thread. First, place the color...
Needle painted Hibiscus
Needle painted Hibiscus This project is carried out in long and short stitch with 1 thread The purpose of this work is to embroider a new subject in needle painting. We have already done several projects of this kind together but I know that many of you still find...
Little Christmas wreath
Little Christmas wreath This little Christmas wreath is a regular feature every year for the holidays. I always like it so much and I have always been amazed by its varied and often unexpected use.I have seen it on napkins, hanging on the Christmas tree, as a...
Tuscan tile part 7
Tuscan tile Corner Here we come to the last part of the realization of this work, the corners. It is in fact simply the same patterns as those made in the main part of the design but simply changing the colors without adding new ones. The only small change is that the...