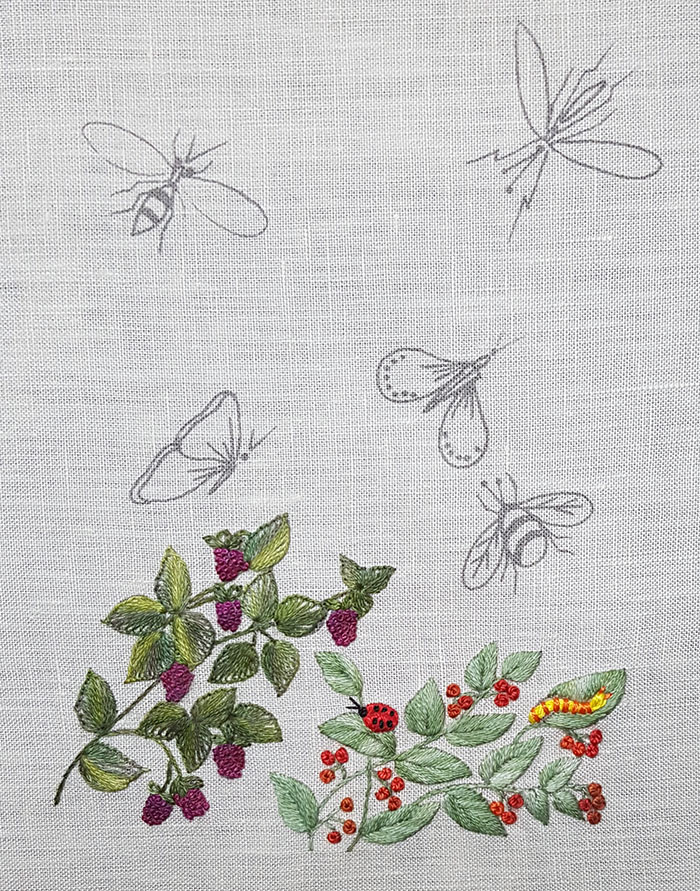
Taking flight
This project contains stumpwork
It is in fact an embroidery that we had made several years ago but which needs a good rejuvenation. I propose you accompany me in this process.
The purpose of this work is to embroider butterflies and insects using different techniques including stumpwork.

The plants
The pattern of this project can be downloaded HERE
Raspberries
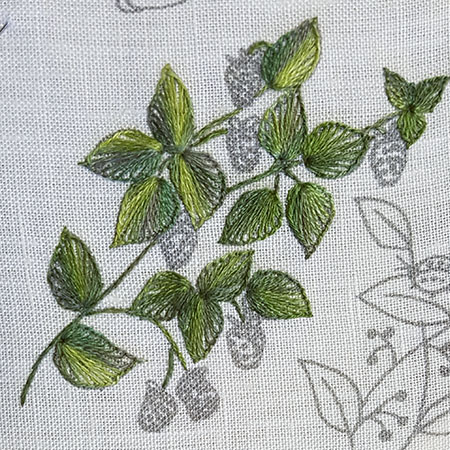
The stems are embroidered in stem stitch with 1 thread.
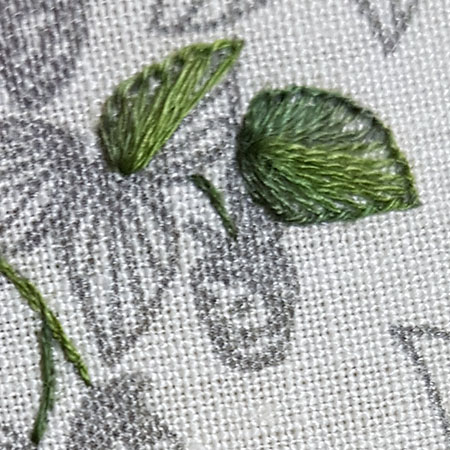
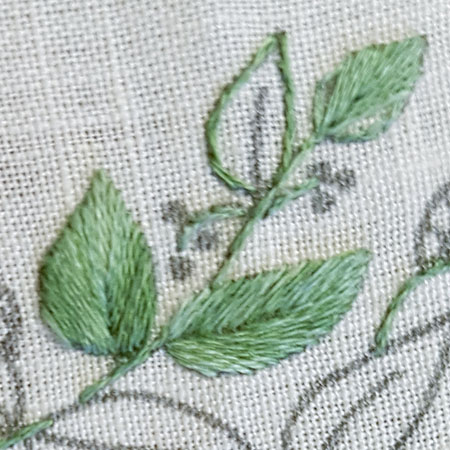
The leaves are embroidered in blanket stitch with 2 threads. All the stitches start from the base of the leaf and are embroidered fan-shaped. To obtain pretty sharp leaves, I fix the stitch to the top and I continue to embroider on the other side of the leaf.
Here is the picture of the completed leaves.
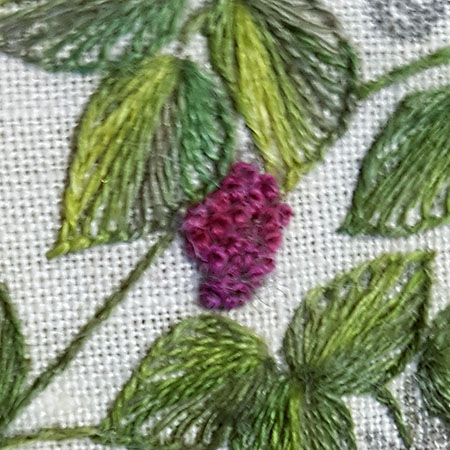
The raspberries are embroidered in French knot with 2 threads and 2 wraps.
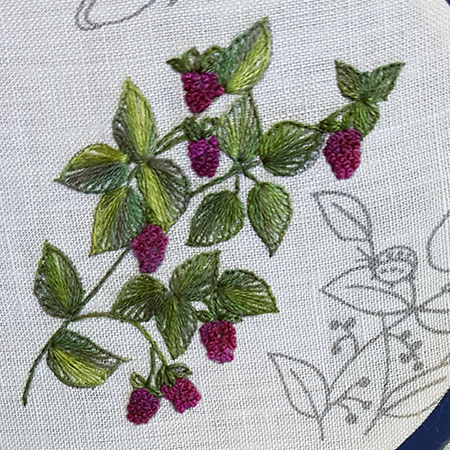
All the embroidered raspberries are complete.
Red currants
The stems are embroidered in stem stitch with 1 thread.
The leaves are first rimed with split back stitch 1 thread then embroidered in fishbone stitch also with 1 thread.
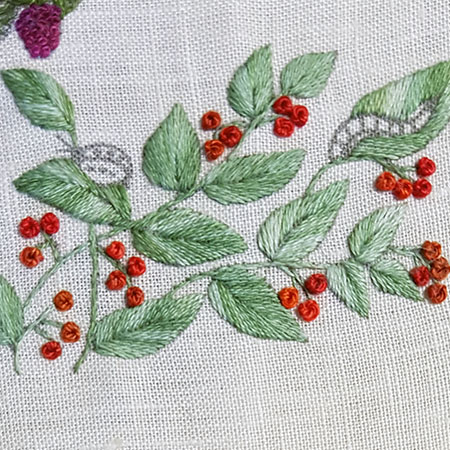
The currants are embroidered in French knot with Perle cotton n ° 8 and 2 wraps.
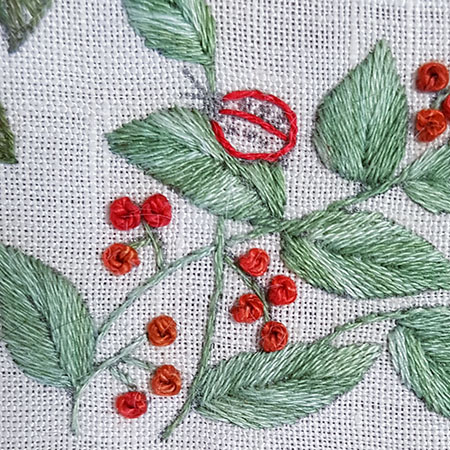
First, embroider the outline of the Ladybug with split back stitch and 1 thread.
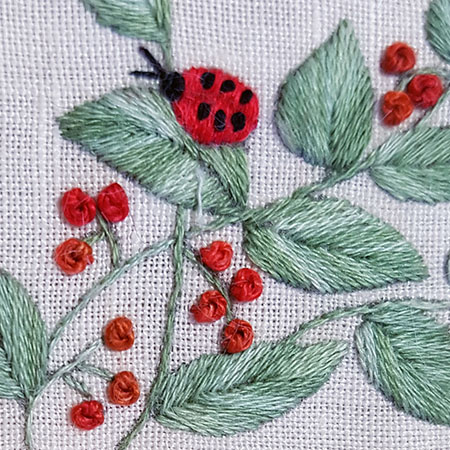
Embroider the Ladybug with satin stitch 1 thread vertically carefully separating the 2 wings.
Embroider the dots on the wings with French knots 2 threads and 1 wrap, the head with a French knot 2 threads 2 wraps and antennas with 2 small straight stitches 1 thread.
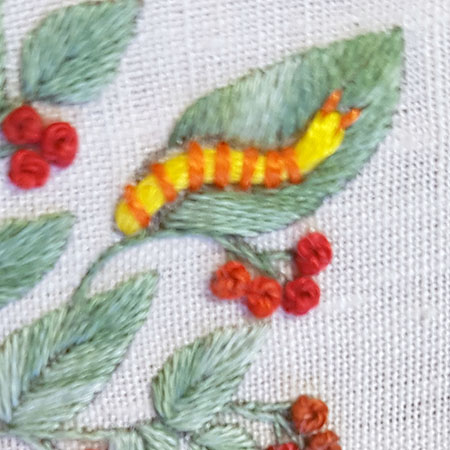
The caterpillar is embroidered in couching with 12 threads for the body and 3 threads for the rings.
The antennas are embroidered in straight stitch with 1 thread.
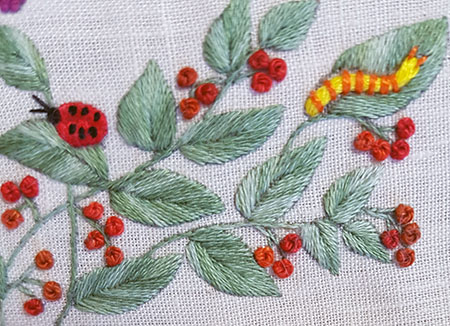
Here is the finished pattern.
Fantasy flower part 6
Fantasy flower Small flowers (9) In the article below are the necessary explanations to embroider the small flowers located in the upper right part of this project (9). and as always the traditional reminder... I remind you that to obtain a beautiful result with...
Fantasy flower part 5
Fantasy flower Large flower completed In the article below are the explanations necessary to complete the realization of the main flower of this project. and as always the traditional reminder... I remind you that to obtain a beautiful result with patterns made...
Fantasy flower part 4
Fantasy flower Continuation of the petals (4) The article below is devoted to the continuation of the petals once again appearing under the numbering 4. They are also embroidered in layers like the previous ones but the central part is different. and as always...
Fantasy flower part 3
Fantasy flower New petals (4, partially) Below are the explanations and photos needed to embroider a new set of petals (4). I finally managed to finish three of them until today. They are all made on the same principle and I will try to embroider the other three...
Fantasy flower part 2
Fantasy flower Petals (2) in the back and center (3) Below you will find the explanations and photos needed to embroider the second row of petals (2) located at the back of the flower as well as the center (3) and the small leaf that accompanies it. I remind you...
Fantasy flower part 1
Flower Fantasy Petals (1) at the back of the flower You will find below the explanations and photos necessary to embroider the 5 petals located at the back of the flower. I remind you that to obtain a beautiful result with patterns made with satin or long and short...
Fantasy flower
Fantasy flower Introduction Here is an introduction to the project I propose to tackle starting next week. The purpose of this work is to use this engraving and carefully observe the details to transform it into beautiful embroidery. For this, we will use mainly long...
A blue and yellow Easter Egg
A blue and yellow Easter Egg Here is the egg expanding the collection of embroidered Easter eggs started in 2018. This year it takes on a special meaning because of the terrible events that are shaking the world and I didn't think much about what colors to use....
Alphabet in 2 versions, second version
Alphabet in two versions 2nd version Here is a second embroidery proposal for this alphabet. I chose to realize this letter in a classic way by respecting all the codes of the "Whitework technique" such as we can see it on the linen of the trousseaux patiently...
Three cats
Three cats Here is an original and fun little project to embroider in a few hours. To make it, I used stem stitch, blanket stitch, chain stitch, long and short stitch (for the tails), and split backstitch. I used 1 or 2 threads depending on the surface to fill...