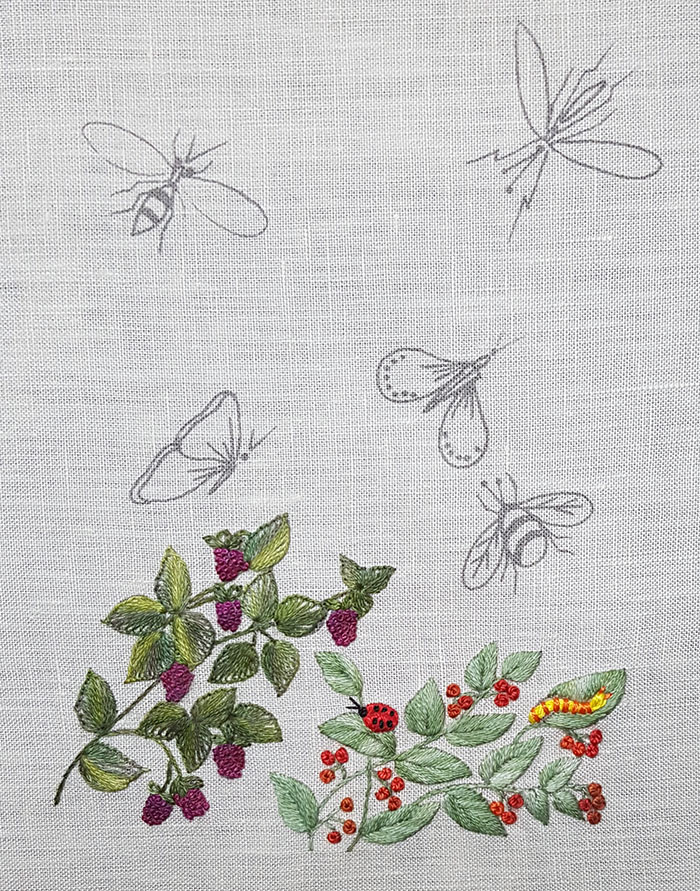
Taking flight
This project contains stumpwork
It is in fact an embroidery that we had made several years ago but which needs a good rejuvenation. I propose you accompany me in this process.
The purpose of this work is to embroider butterflies and insects using different techniques including stumpwork.

The plants
The pattern of this project can be downloaded HERE
Raspberries
The stems are embroidered in stem stitch with 1 thread.
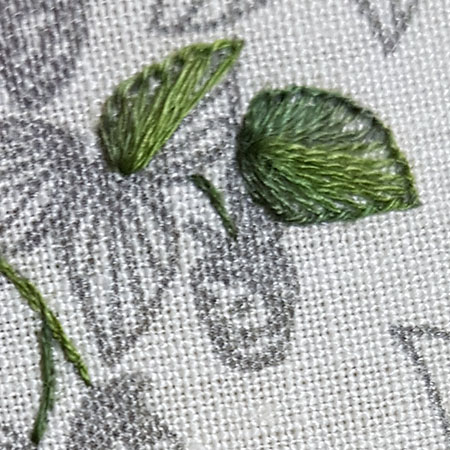
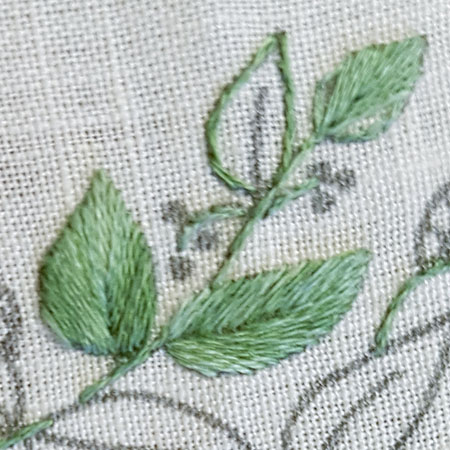
The leaves are embroidered in blanket stitch with 2 threads. All the stitches start from the base of the leaf and are embroidered fan-shaped. To obtain pretty sharp leaves, I fix the stitch to the top and I continue to embroider on the other side of the leaf.
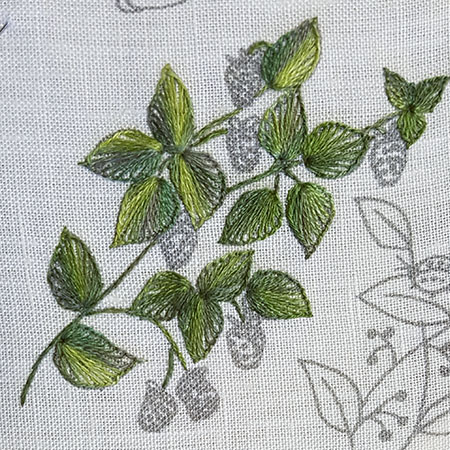
Here is the picture of the completed leaves.
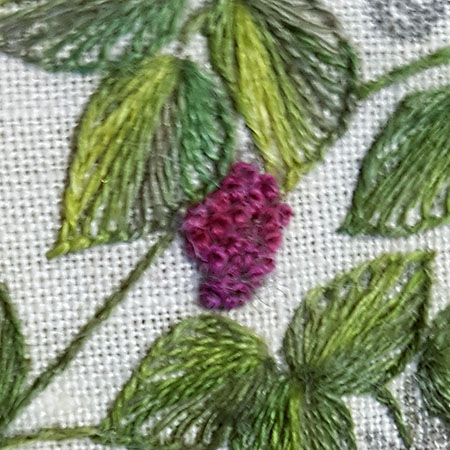
The raspberries are embroidered in French knot with 2 threads and 2 wraps.
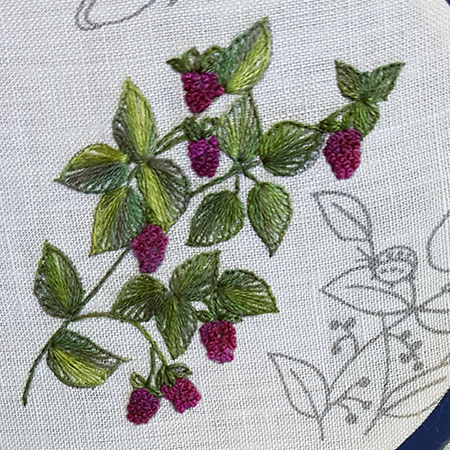
All the embroidered raspberries are complete.
Red currants
The stems are embroidered in stem stitch with 1 thread.
The leaves are first rimed with split back stitch 1 thread then embroidered in fishbone stitch also with 1 thread.
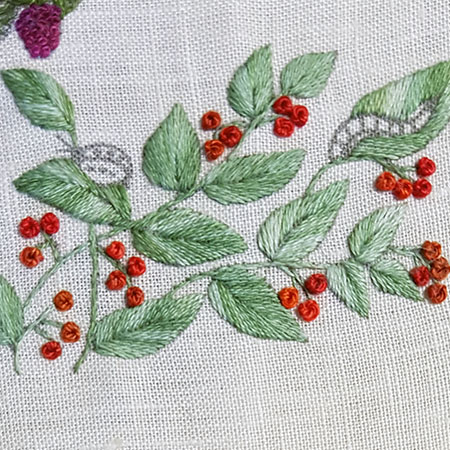
The currants are embroidered in French knot with Perle cotton n ° 8 and 2 wraps.
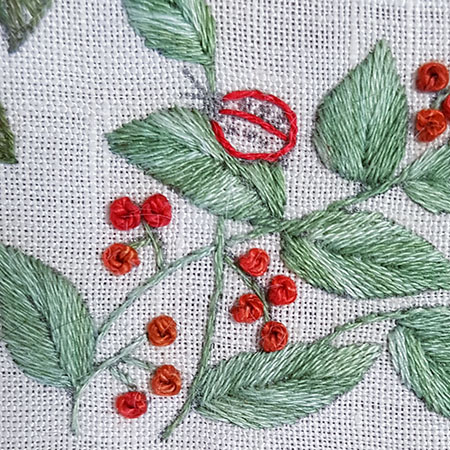
First, embroider the outline of the Ladybug with split back stitch and 1 thread.
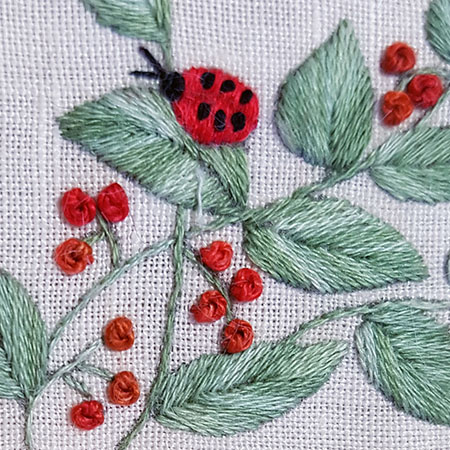
Embroider the Ladybug with satin stitch 1 thread vertically carefully separating the 2 wings.
Embroider the dots on the wings with French knots 2 threads and 1 wrap, the head with a French knot 2 threads 2 wraps and antennas with 2 small straight stitches 1 thread.
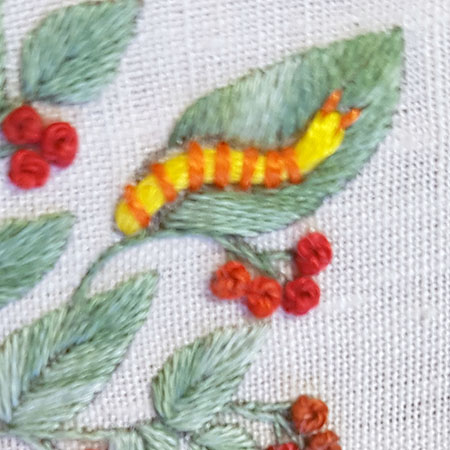
The caterpillar is embroidered in couching with 12 threads for the body and 3 threads for the rings.
The antennas are embroidered in straight stitch with 1 thread.
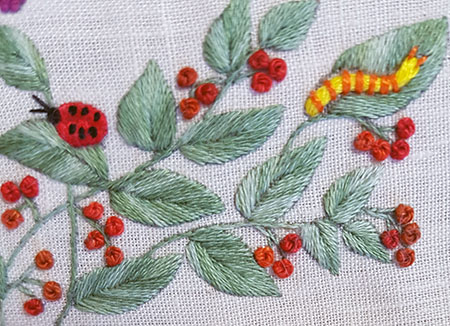
Here is the finished pattern.
Romantic Alphabet
Romantic AlphabetThis alphabet that I called romantic is part of many vintage alphabets published online by "Maison Sajou". You will find the patterns of all the characters together in a single downloadable file in the "patterns 2021" menu. Here is an indicative list...
Gypsy Heart
Gypsy Heart You will find in this post the detailed photos as well as the list of the threads that I used to realize this small design. It measures 9/7 cm in its original size. You will find this drawing to download in the "Patterns" menu under the heading "Patterns...
Fireworks part 5
Fireworks continuation and the end You will find in this article, the explanations necessary for the realization of the flames 15, 16, 17, 18, 19, 20, 22, 23, and the center.Flame n°15 The flame is embroidered with long and short stitch on the right side and...
Cupcake part 4
Cupcake the strawberryFor the realization of this strawberry, I used the following colors DMC stranded cotton 353, 352, 350, 349, 817, 816, 814, 581, 3345, 734. Start making this strawberry using colors 353 and 352. Continue with color 350. ... then with the...
Fireworks part 4
Fireworks part 4In this article you will find the explanations for the completion of the flames 11, 12, 13,14, 29, 30, 24 and 25. Flame n°11 The flame is fully embroidered with long and short stitch using colors 799, 928, 943. Flame n°12 The flame is fully...
A Spring Easter Egg
A Spring Easter Egg Here are the explanations necessary for the realization of this Easter egg. The pattern of this project can be downloaded from the "Patterns" menu in the "Patterns 2021" section. It is here embroidered on vanilla linen and measures about...
Fireworks part 3
Fireworks part 3 You will find in this article, the explanations necessary for the realization of the flames 27, 8, 9, 10 and 28.Flame n°27 The flame is embroidered with satin stitch and long and short stitch with the colors 3335, 799, 797, 208, and 333. Flame...
Cupcake part 3
Cupcake The whipped cream Here are the explanations necessary for the realization of the whipped cream. To embroider this part of the cupcake, I used the stranded DMC threads B5200, 3685, 961, 962, 963 as proposed in the introductory article. The photos below...
Fireworks part 2
Fireworks part 2 In order to continue to progress in this project, here are the explanations necessary for the realization of flames n ° 2, 5, 6, 26, and 7.Flame n°2 The center is embroidered with battlement couching and the colors 3705, 817, 3688, and 3354. To...
Cupcake part 2
Cupcake The paper mold Here are the explanations necessary to make the paper mold The detailed list of threads used for this project can be found in the previous article. Mark the edges of the mold with split backstitch and color 400 on the right, color...