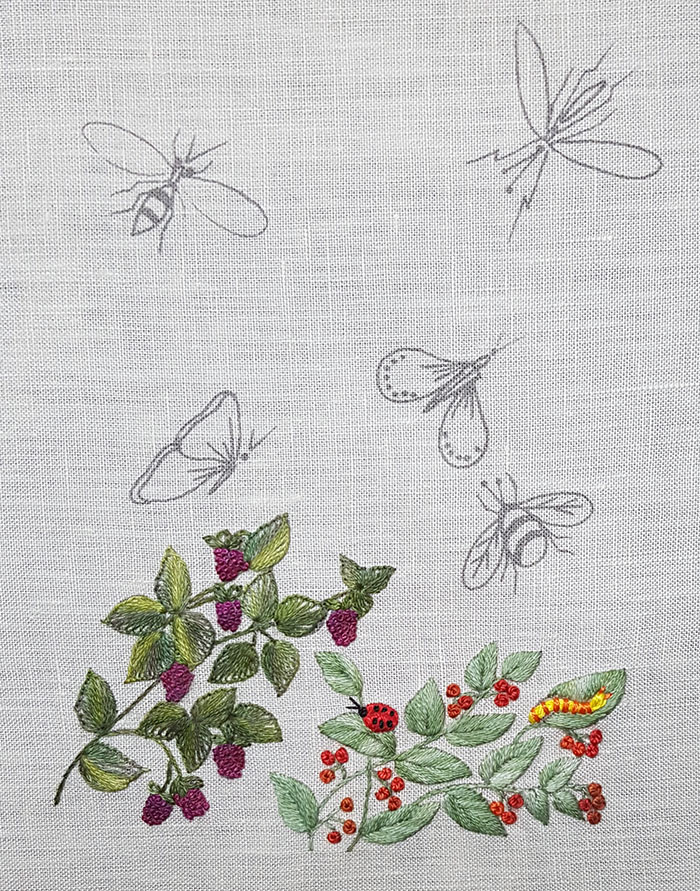
Taking flight
This project contains stumpwork
It is in fact an embroidery that we had made several years ago but which needs a good rejuvenation. I propose you accompany me in this process.
The purpose of this work is to embroider butterflies and insects using different techniques including stumpwork.

The plants
The pattern of this project can be downloaded HERE
Raspberries
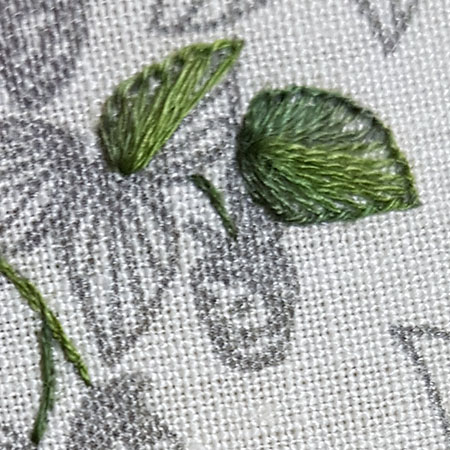
The stems are embroidered in stem stitch with 1 thread.
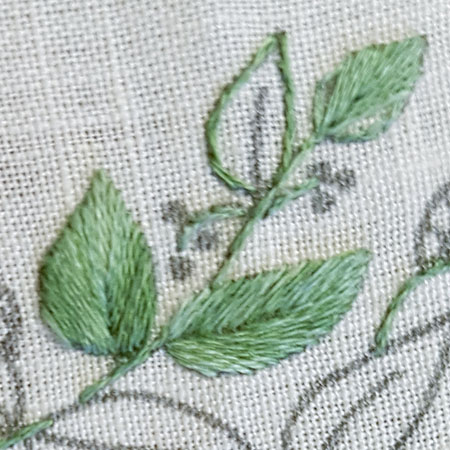
The leaves are embroidered in blanket stitch with 2 threads. All the stitches start from the base of the leaf and are embroidered fan-shaped. To obtain pretty sharp leaves, I fix the stitch to the top and I continue to embroider on the other side of the leaf.
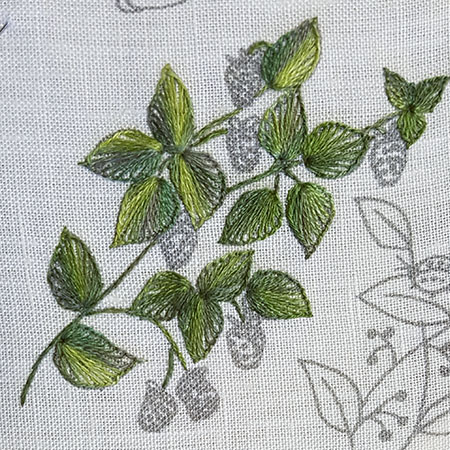
Here is the picture of the completed leaves.
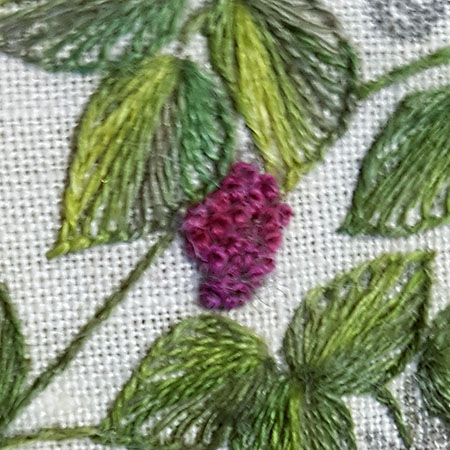
The raspberries are embroidered in French knot with 2 threads and 2 wraps.
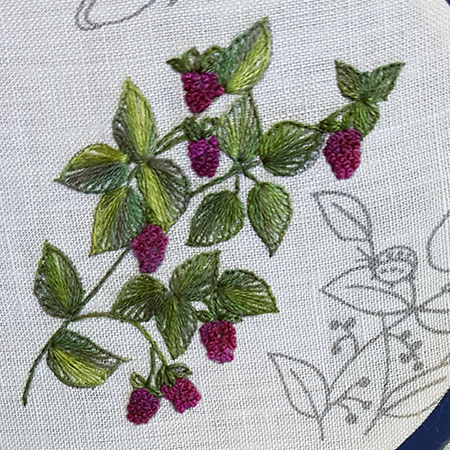
All the embroidered raspberries are complete.
Red currants
The stems are embroidered in stem stitch with 1 thread.
The leaves are first rimed with split back stitch 1 thread then embroidered in fishbone stitch also with 1 thread.
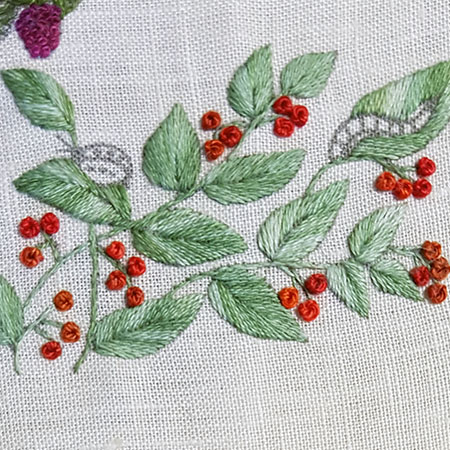
The currants are embroidered in French knot with Perle cotton n ° 8 and 2 wraps.
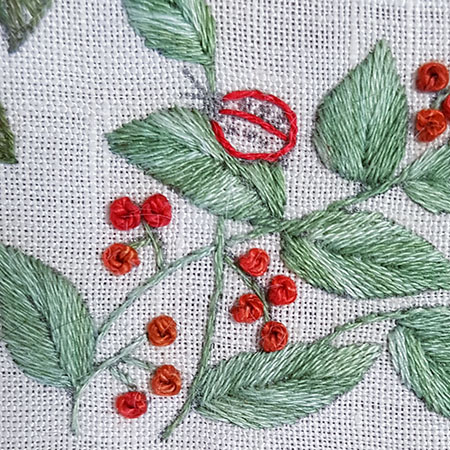
First, embroider the outline of the Ladybug with split back stitch and 1 thread.
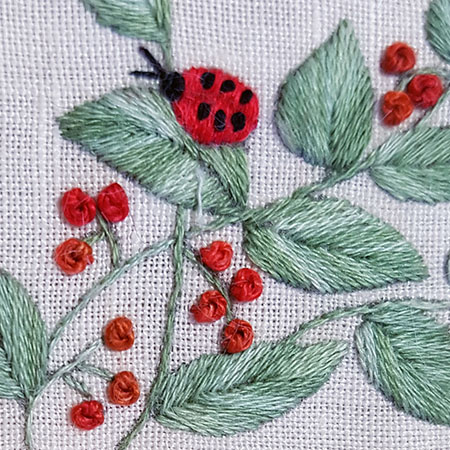
Embroider the Ladybug with satin stitch 1 thread vertically carefully separating the 2 wings.
Embroider the dots on the wings with French knots 2 threads and 1 wrap, the head with a French knot 2 threads 2 wraps and antennas with 2 small straight stitches 1 thread.
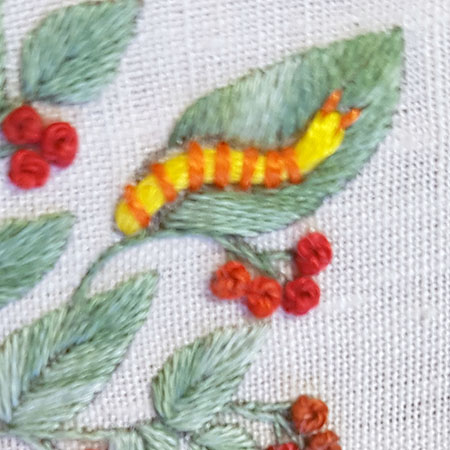
The caterpillar is embroidered in couching with 12 threads for the body and 3 threads for the rings.
The antennas are embroidered in straight stitch with 1 thread.
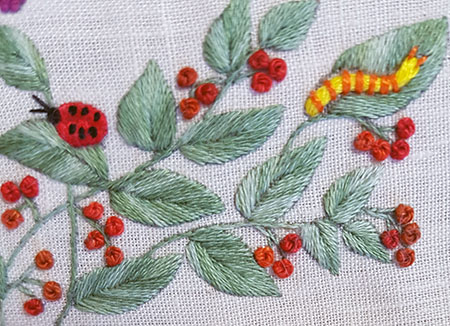
Here is the finished pattern.
Tuscan tile
Tuscan tile Introduction Here is the new project that I propose to realize at the end of the holidays and that will certainly keep us busy (alternating with other less important works) until winter. A free interpretation of this magnificent old Tuscan tile will be...
“Basket of flowers” needlecase part 2
"Basket of Flowers" needlecase the basket In the second article dedicated to this needle holder project, you will find all the photos and explanations concerning the realization of the flower bouquet. In the photo on the left, you can see the stitches used to make...
“Basket of flowers” needlecase
"Flower basket" needlecase Background work First of all, here is the history of this project... Initially, this new needlecase was simply intended to replace my already well-worn one and also to serve as an excuse to offer you a little relaxing holidays work. And...
Fantasy flower last part
Fantasy flower Large flower at bottom right, embroidery finished In the article below, are the explanations necessary to embroider the 2 large petals (8) that are in front of the bottom flower and thus finish this embroidery. As with the previous petals of this...
Fantasy flower part 10
Fantasy flower Large flower at the bottom right of the pattern ...read more In the article below are the necessary explanations to embroider the small leaves and the continuation of the petals of the large flower located at the bottom of the pattern. Small leaves at...
Fantasy flower part 9
Fantasy flower Large flower at the bottom right of the design In the article below are the explanations needed to embroider the first petals of the large flower at the bottom of the design. These petals are worked according to the same principle, in "layers", as the...
The blue cat’s garden
The blue cat's garden This garden is especially for the embroiderers participating in my group classes. After having successfully embroidered a first work entitled "How to embroider a garden with 9 basic stitches", these students, often beginners,...
Fantasy flower part 8
Fantasy flower Leaves (12) Small flowers (10) In the article below are the necessary explanations to embroider the branch on the left (12) and the group of small central flowers (10). In this particular work, the satin stitch and the long and short stitch are always...
Fantasy flower part 7
Fantasy flower Leaves (11) In the article below are the necessary explanations to embroider a whole series of leaves located under the main flower (11). In this work, the satin stitch and the long and short stitch are always made with 1 thread. The decorative stitches...
Love
LOVE This article is the starting point of a new project which will be the publication of a new flowery alphabet. My idea is to succeed in designing all the characters of this alphabet by introducing them in words to be able to finally have the complete...