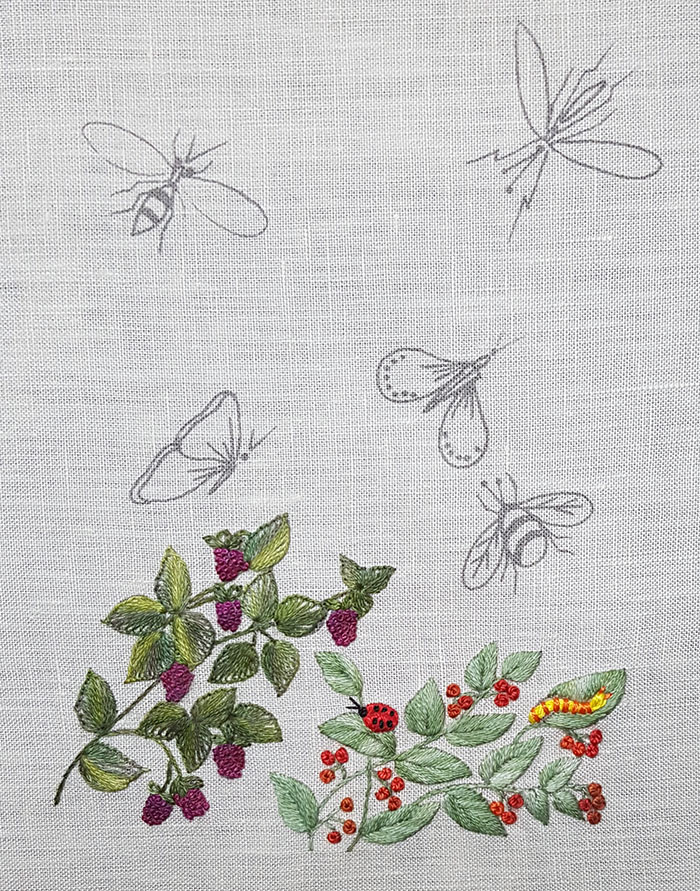
Taking flight
This project contains stumpwork
It is in fact an embroidery that we had made several years ago but which needs a good rejuvenation. I propose you accompany me in this process.
The purpose of this work is to embroider butterflies and insects using different techniques including stumpwork.

The plants
The pattern of this project can be downloaded HERE
Raspberries
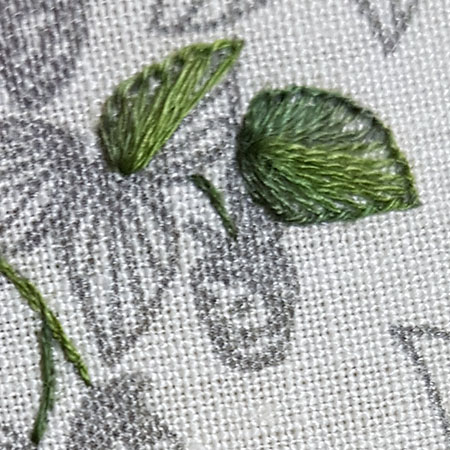
The stems are embroidered in stem stitch with 1 thread.
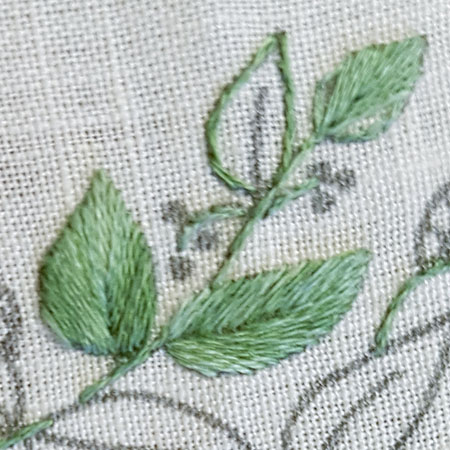
The leaves are embroidered in blanket stitch with 2 threads. All the stitches start from the base of the leaf and are embroidered fan-shaped. To obtain pretty sharp leaves, I fix the stitch to the top and I continue to embroider on the other side of the leaf.
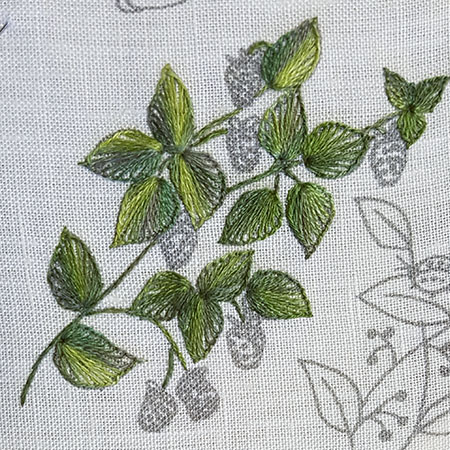
Here is the picture of the completed leaves.
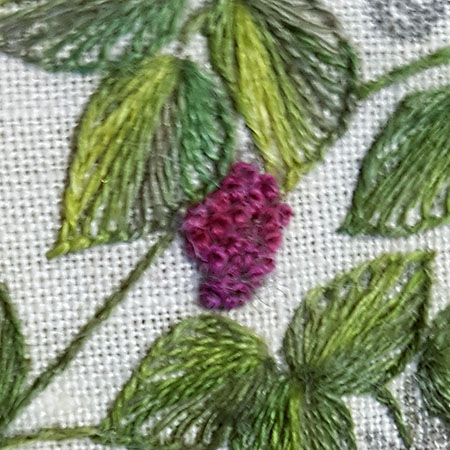
The raspberries are embroidered in French knot with 2 threads and 2 wraps.
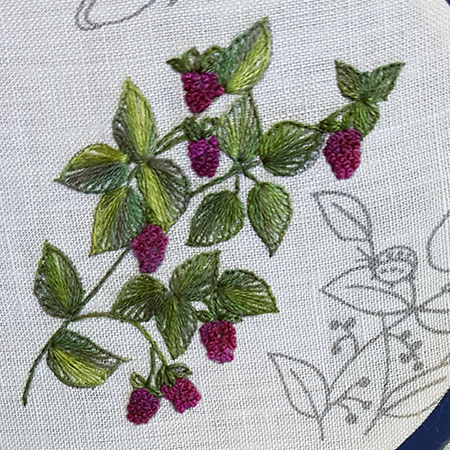
All the embroidered raspberries are complete.
Red currants
The stems are embroidered in stem stitch with 1 thread.
The leaves are first rimed with split back stitch 1 thread then embroidered in fishbone stitch also with 1 thread.
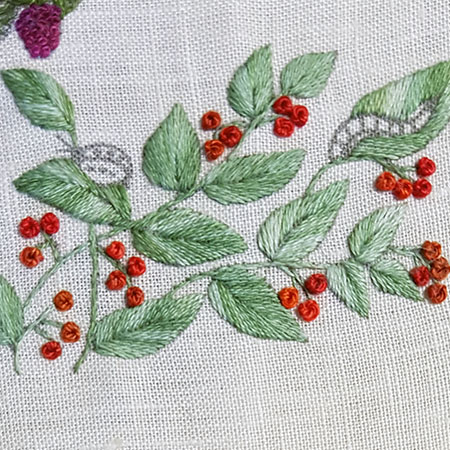
The currants are embroidered in French knot with Perle cotton n ° 8 and 2 wraps.
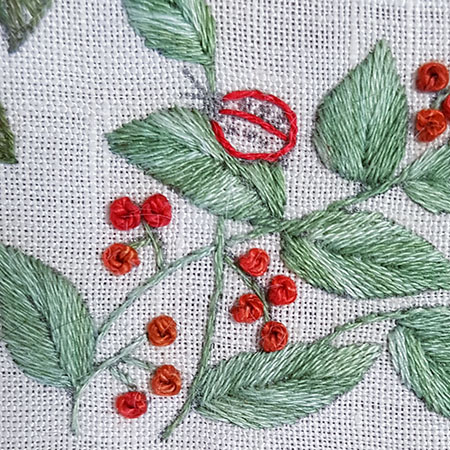
First, embroider the outline of the Ladybug with split back stitch and 1 thread.
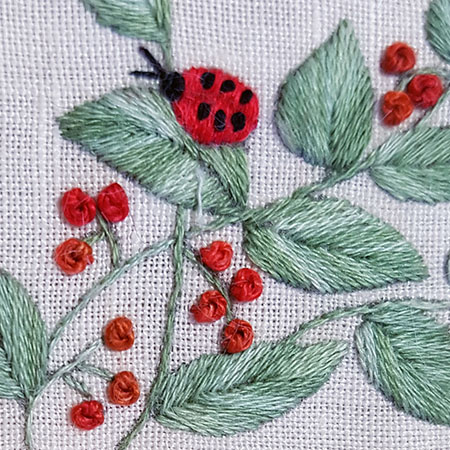
Embroider the Ladybug with satin stitch 1 thread vertically carefully separating the 2 wings.
Embroider the dots on the wings with French knots 2 threads and 1 wrap, the head with a French knot 2 threads 2 wraps and antennas with 2 small straight stitches 1 thread.
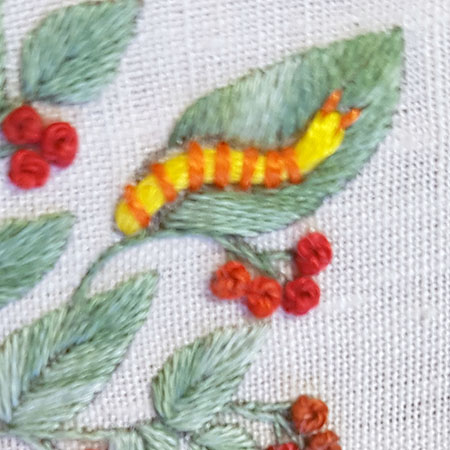
The caterpillar is embroidered in couching with 12 threads for the body and 3 threads for the rings.
The antennas are embroidered in straight stitch with 1 thread.
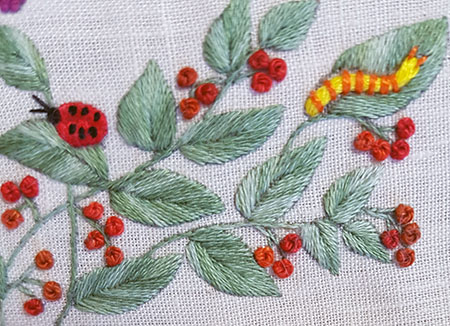
Here is the finished pattern.
Garlands
Garlands "Garlands" is one of the emblematic projects that have marked the history of Canevas Folies. Like the Needlecases series, it belongs to the basic collection, designed to support beginners as well as experienced embroiderers. Its richness lies in the wide...
Acanthus leaves alphabet
Acanthus leaves alphabet second versionThis is the definitive version of the Acanthus leaf alphabet. Indeed, the realization of these letters as I had imagined them turned out to be quite simply catastrophic. So I decided to stick to my original idea: to propose a...
Tissue Box tile 4
Tissue Box Tile 4This week, we continue our adventure with the tissue box, embroidering his fourth and last side. Still inspired by Mexican tiles, these colorful and rhythmic patterns provide the perfect playground for experimenting with new colors and stitches. This...
Tissue Box tile 3
Tissue Box tile 3After bright yellow and brilliant blue, I'd like to introduce you to the third side of my tissue box today. I chose to embroider it in shades of old rose, a soft, elegant color that contrasts beautifully with the previous tones.Still inspired by...
Tissue Box, tile 2
Tissue Box tile 2Following on from the floral tissue box started last week, today I'd like to invite you to discover the second tile, again inspired by the magnificent Mexican tiles found in artisan markets. These little paintings, with their geometric or vegetal...
Tissue box
Tissue Box Tile 1 This new tissue box project combines the useful with the pleasurable: a simple object to integrate into the home, but worked in detail to make it a refined piece. I've designed four small, complementary motifs that will work equally well on this...
Hollyhocks part 5
Hollyhocks The leaves part 5Here are the photos and their explanations for making the second part of the leaves. I embroidered them in the same colors as the first part.First embroider a blanket stitch spaced all around the leaf, then insert a straight stitch in a...
Hollyhocks part 4
Hollyhocks The foliage This new article is devoted to hollyhock foliage, in particular the branch visible on the right of the drawing. I wanted to show how possible it is, with a few well-chosen stitches and a subtle play of colors, to bring leaves to life and make...
Hollyhocks part 3
Hollyhocks part 3 This article explains how to make the two remaining flowers. I used a variety of stitches to give structure to the design. You'll find explanations of these stitches in the stitches menu of this blog. To make the orange flower, I added two new...
Hollyhocks part 2
Hollyhocks part 2 This article explains how to create the flower at the bottom left of the design, embroidered in the pink tones suggested last week. I added 2 new variegated threads to the original palette and used a series of various stitches to give structure to...