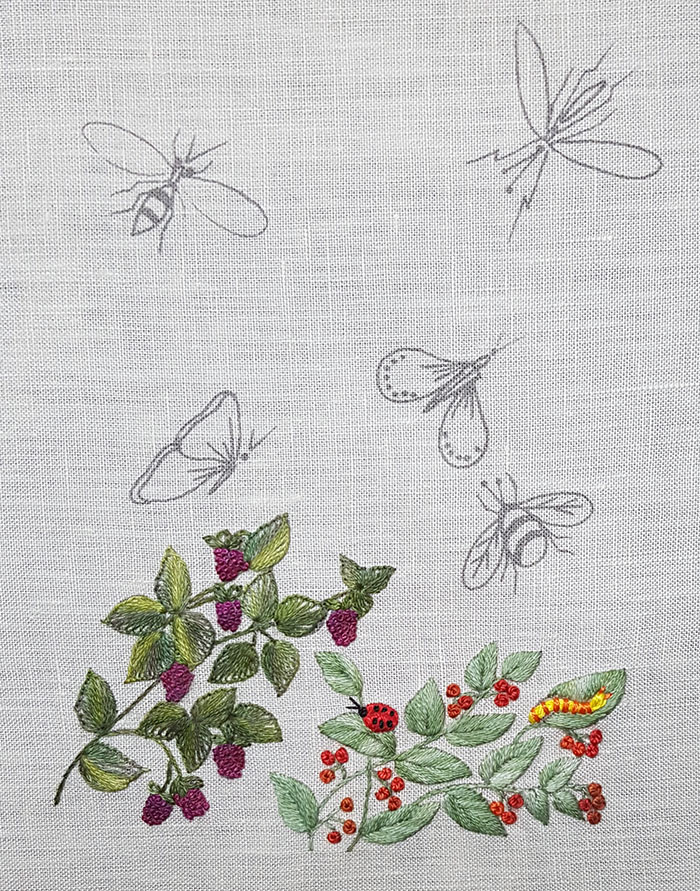
Taking flight
This project contains stumpwork
It is in fact an embroidery that we had made several years ago but which needs a good rejuvenation. I propose you accompany me in this process.
The purpose of this work is to embroider butterflies and insects using different techniques including stumpwork.

The plants
The pattern of this project can be downloaded HERE
Raspberries
The stems are embroidered in stem stitch with 1 thread.
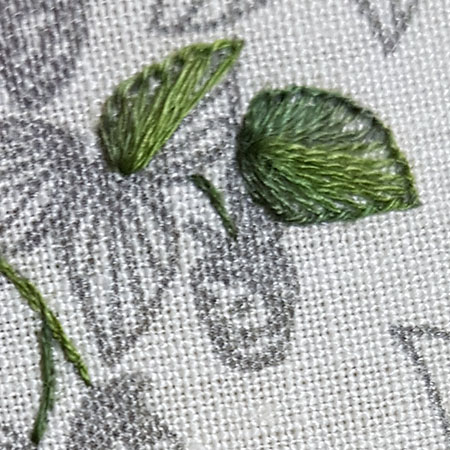
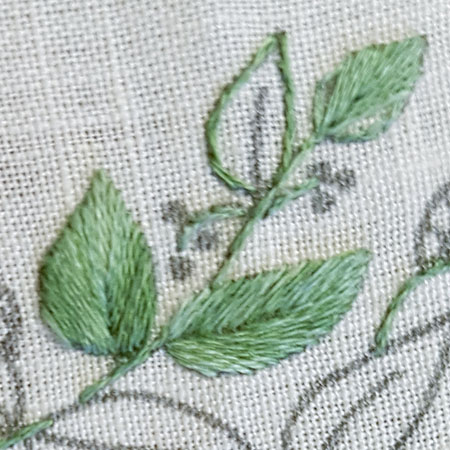
The leaves are embroidered in blanket stitch with 2 threads. All the stitches start from the base of the leaf and are embroidered fan-shaped. To obtain pretty sharp leaves, I fix the stitch to the top and I continue to embroider on the other side of the leaf.
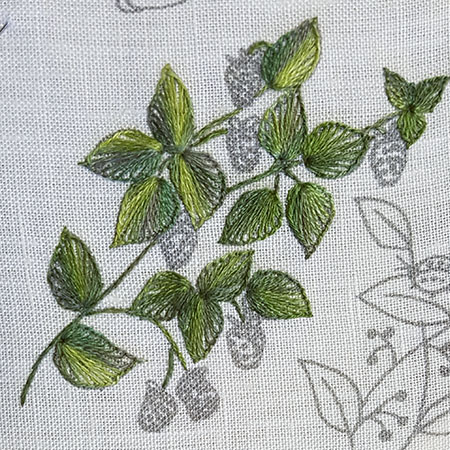
Here is the picture of the completed leaves.
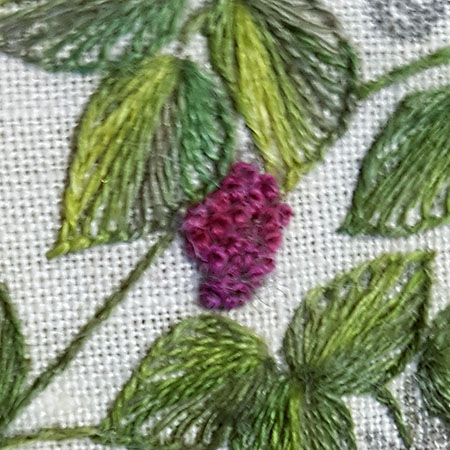
The raspberries are embroidered in French knot with 2 threads and 2 wraps.
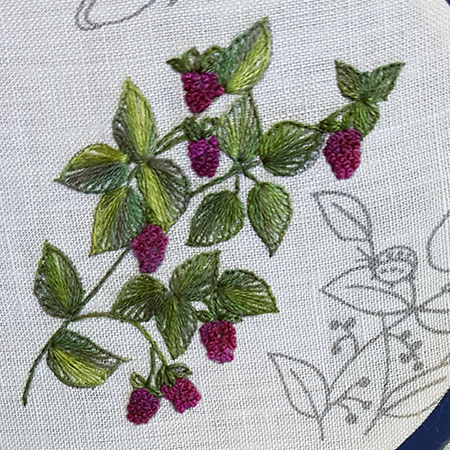
All the embroidered raspberries are complete.
Red currants
The stems are embroidered in stem stitch with 1 thread.
The leaves are first rimed with split back stitch 1 thread then embroidered in fishbone stitch also with 1 thread.
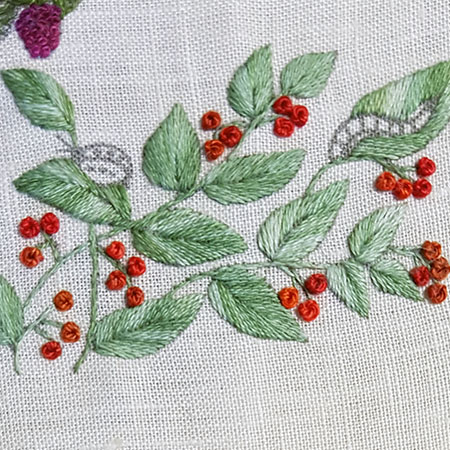
The currants are embroidered in French knot with Perle cotton n ° 8 and 2 wraps.
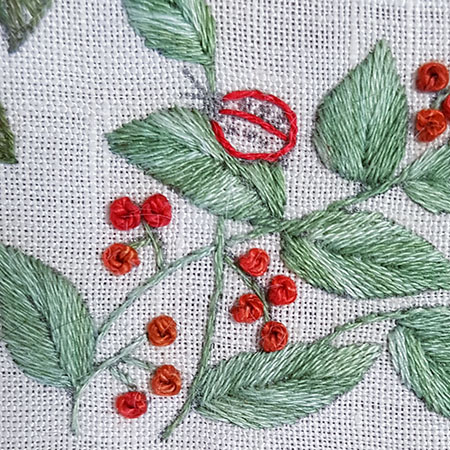
First, embroider the outline of the Ladybug with split back stitch and 1 thread.
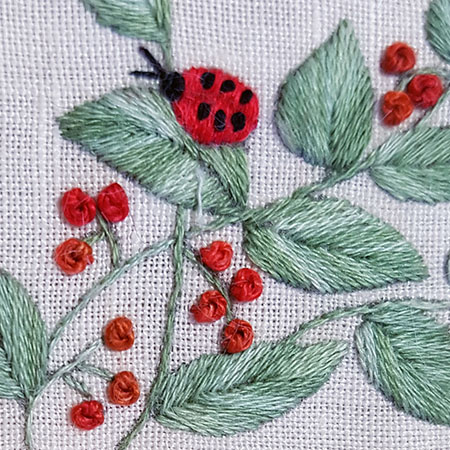
Embroider the Ladybug with satin stitch 1 thread vertically carefully separating the 2 wings.
Embroider the dots on the wings with French knots 2 threads and 1 wrap, the head with a French knot 2 threads 2 wraps and antennas with 2 small straight stitches 1 thread.
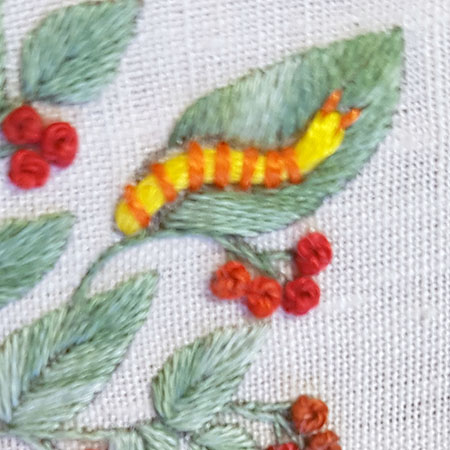
The caterpillar is embroidered in couching with 12 threads for the body and 3 threads for the rings.
The antennas are embroidered in straight stitch with 1 thread.
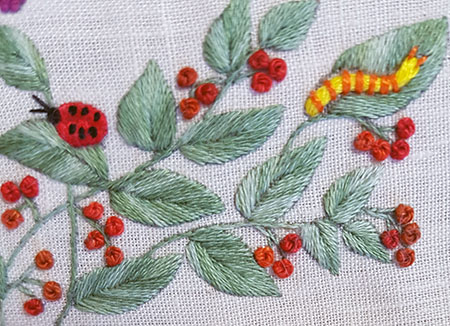
Here is the finished pattern.
Embroidered coloring page part 5
Embroidered coloring page part 5 Here are the explanations necessary for the making of the 5 small flowers which are added to the main patterns. First of all, to begin with, in the colors of "Flamenco".This flower is embroidered with satin stitch on 2-thread...
Embroidered coloring page part 4
Embroidered coloring page part 4 Today you will find first the continuation of the work in the "Flamenco" colors. After having edged the entire pattern with split backstitch 1 thread, start by embroidering the first color at the tip of each petal. You will see that I...
Embroidered coloring page part 3
Embroidered coloring page part 3 Here is, to start with and for a change, in the "Cool Mint" atmosphere the realization of 2 seemingly simple large flowers but not so easy to embroider. Embroider the outlines of the petals with a spaced blanket stitch 1 thread. Fill...
Embroidered coloring page part 2
Embroidered coloring page part 2 The large central flower In the "Flamenco" atmosphere, here is the realization of the large central flower in orange tones. Remember that you will find explanations of the used stitches in the "Stitches" section of the menu. Embroider...
Embroidered coloring page
Embroidered coloring page The purpose of this series of summer articles is to show how to make a unique and personal embroidery starting from a simple black and white drawing. As I really like adult coloring pages, which have been so fashionable for quite some time...
Schwalm traditional design part 3
Schwalm traditional design part 3 In this post, you will find the explanations necessary to complete this work. Large TulipFirst, prepare the surface by pulling horizontally and vertically 1 thread and leaving 3 to get a grid as in the picture. Embroider...
Small floral designs
Small floral designs You will find below the pictures of the embroidered floral designs which I proposed to you last week. In case you haven't downloaded them yet, you can do it HERE. I did not always respect the number of threads indicated in the explanations in...
Eyeglass Case
Eyeglass case This is one of the first Canevas Folies embroideries. We used many basic stitches to achieve it. You will find how to manage these stitches in the "stitches" section of the menu. I wanted to take this opportunity to put on line the explanations of the...
Edwardian Parrot part 13
Edwardian Parrot part 13, the crest Here are the explanations and the pictures necessary to finish the head of the parrot. List of colors used to embroider this pattern 221, 316, 778, 407,3753, 3371, 422, 841, 415, 642, 349 and 813 (new colors). Always embroider...
Schwalm traditional design part 2
Traditional design part 2 In this post, you will find the explanations necessary to embroider the vertical patterns of the basket and the star pattern which appears in the center of the heart. Basket The lateral patterns are made as follows: without drawing...