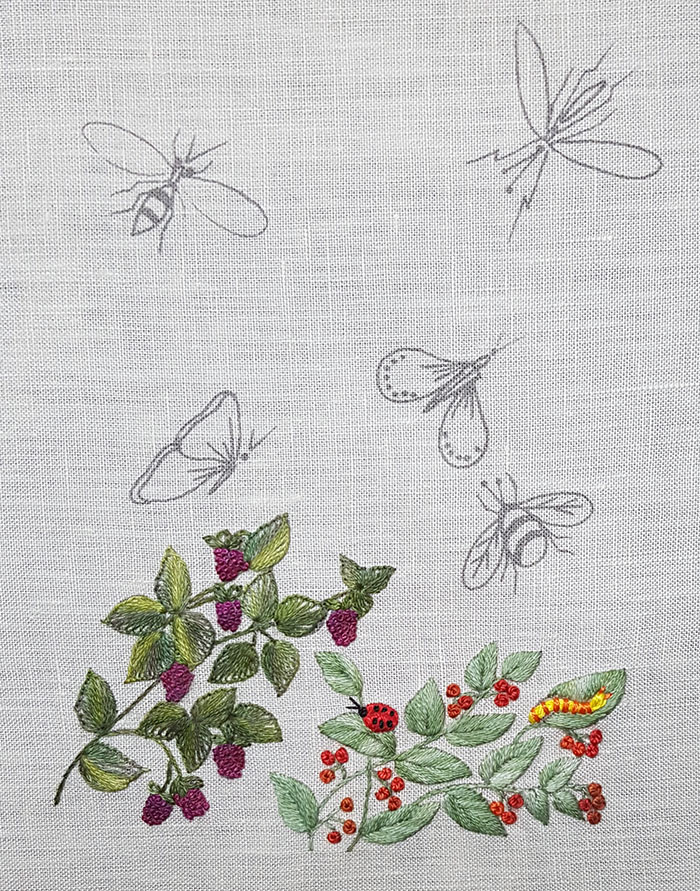
Taking flight
This project contains stumpwork
It is in fact an embroidery that we had made several years ago but which needs a good rejuvenation. I propose you accompany me in this process.
The purpose of this work is to embroider butterflies and insects using different techniques including stumpwork.

The plants
The pattern of this project can be downloaded HERE
Raspberries
The stems are embroidered in stem stitch with 1 thread.
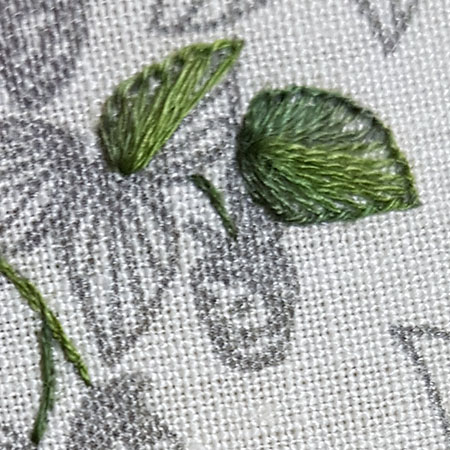
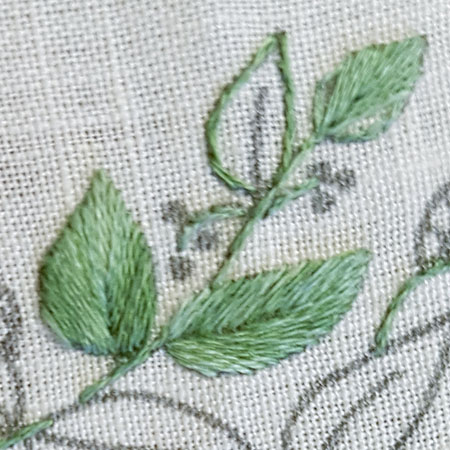
The leaves are embroidered in blanket stitch with 2 threads. All the stitches start from the base of the leaf and are embroidered fan-shaped. To obtain pretty sharp leaves, I fix the stitch to the top and I continue to embroider on the other side of the leaf.
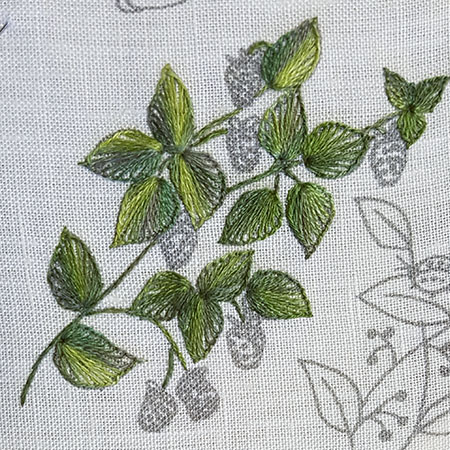
Here is the picture of the completed leaves.
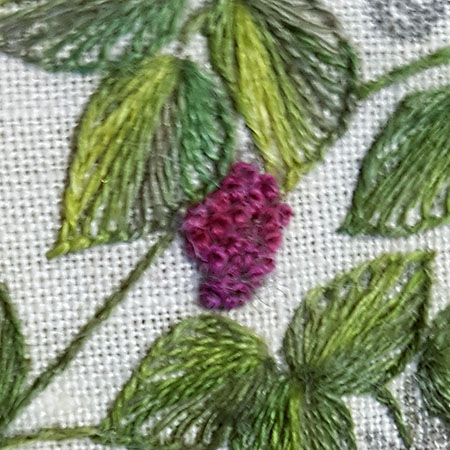
The raspberries are embroidered in French knot with 2 threads and 2 wraps.
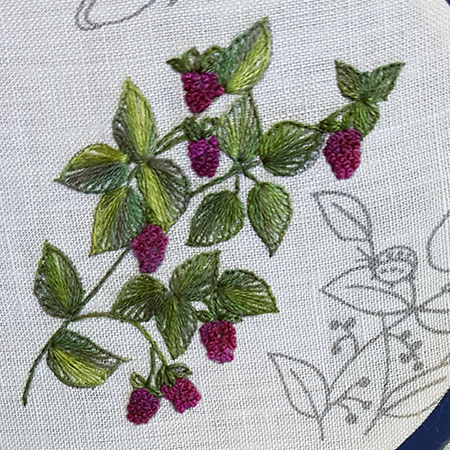
All the embroidered raspberries are complete.
Red currants
The stems are embroidered in stem stitch with 1 thread.
The leaves are first rimed with split back stitch 1 thread then embroidered in fishbone stitch also with 1 thread.
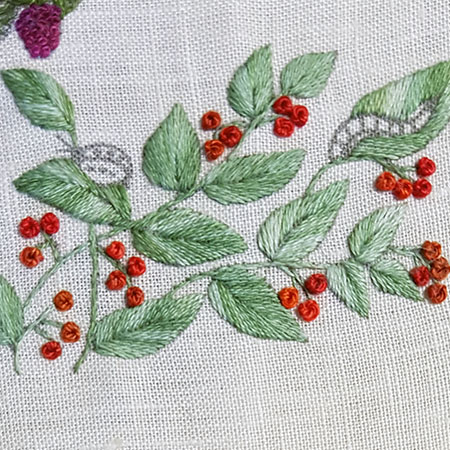
The currants are embroidered in French knot with Perle cotton n ° 8 and 2 wraps.
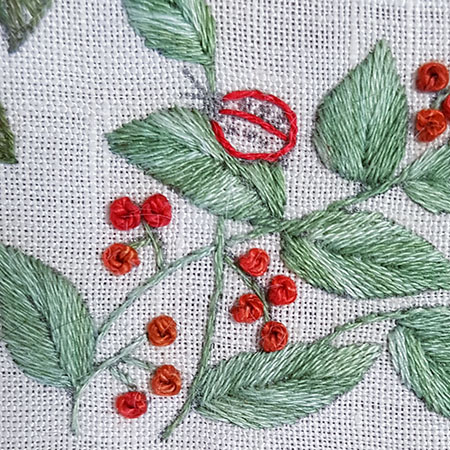
First, embroider the outline of the Ladybug with split back stitch and 1 thread.
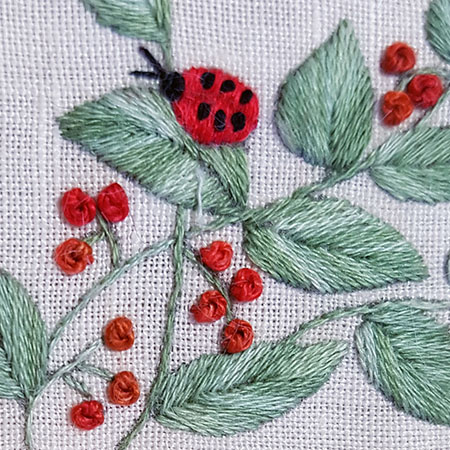
Embroider the Ladybug with satin stitch 1 thread vertically carefully separating the 2 wings.
Embroider the dots on the wings with French knots 2 threads and 1 wrap, the head with a French knot 2 threads 2 wraps and antennas with 2 small straight stitches 1 thread.
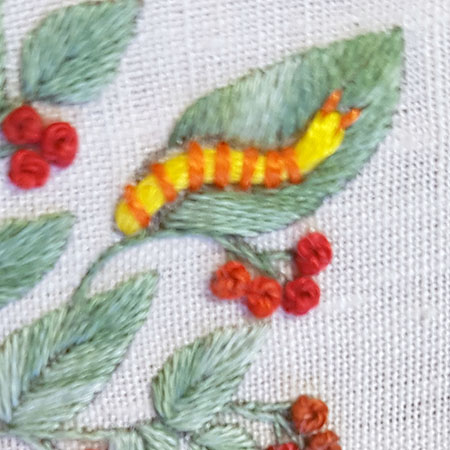
The caterpillar is embroidered in couching with 12 threads for the body and 3 threads for the rings.
The antennas are embroidered in straight stitch with 1 thread.
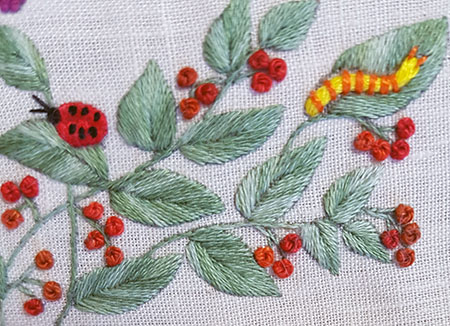
Here is the finished pattern.
Edwardian Parrot part 7
Edwardian Parrot part 7, the Palm Here are the explanations and the pictures necessary to embroider the palm at the bottom of the pattern. Use the images to determine their placement. It's on the finished photo that the nuances are the easiest to...
Edwardian Parrot part 6
Edwardian Parrotpart 6, the pink flower Here are the explanations and the pictures necessary to embroider the pink flower and the leaves of the bottom of the pattern. Use the images to determine their placement. It's on the completed photo that the...
Surprise egg
Surprise egg It's a tradition at Canevas Folies. Each year before Easter it is a pleasure for me to offer an embroidered egg to mark the end of winter. It is a small work of a few hours and for this edition I chose a chiseled and monochrome embroidery. ...
Edwardian Parrot part 5
Edwardian Parrot part 5, the camellia Here are the explanations and the pictures necessary to embroider the camellia. I have numbered the petals to facilitate the work and you will find the colors used in each petal. Use the images to determine their...
Edwardian Parrot part 4
Edwardian Parrot part 4, top left corner Here are the explanations and the pictures necessary to embroider the pattern located in the upper left corner of the work. It has a flower and leaves. I used the same threads as before without adding new colors...
Edwardian Parrot part 3
Edwardian Parrot 3rd part, top motif Here are the explanations and the pictures necessary to embroider the pattern located along the upper edge of the design. It is composed of leaves, flowers and buds I used the same threads as before but adding another...
Embroidered belt
Embroidered belt The choice of threads and patterns Today's subject is devoted to a project that I was asked to carry out some time ago and whose execution gives me immense pleasure. It is all about embroidering a belt for a magnificent and very simple wedding dress...
Edwardian Parrot, Orchid part 2
Edwardian Parrot Orchid part 2 Here are the explanations and the pictures necessary to embroider the 2 large open flowers at the top of the orchid. I used the same threads as for the buds but adding the colors 778 and 316 to embroider the corollas. The...
Edwardian Parrot Orchid part 1
Edwardian Parrot Orchid part 1 Here are the explanations and the pictures necessary to embroider the stems and flowers still in buds of this design. To carry out this work, I decided to embroider first all the vegetal parts, then the bird and to finish...
Edwardian Parrot
Edwardian Parrot Here is a photo of a printed fabric from the period called "EDWARDIAN ERA" which I propose to embroider together. This period extends from the end of the 19th century to the start of the First World War and corresponds to the period called "BELLE...